Importing an animated gif skeleton to use in your movie
 1.
Open your project file from part 2 of the haunted house project. Click
Insert=> New symbol. Call the symbol skeleton1 and give it the properties of
a movie clip. 1.
Open your project file from part 2 of the haunted house project. Click
Insert=> New symbol. Call the symbol skeleton1 and give it the properties of
a movie clip.
 2.
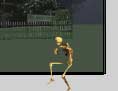
With the new symbol open, Click File=> import. Select the skeleton from
the file you downloaded for this tutorial. This will import the gif to
your movie clip and separate the frames of the animation to keyframes. 2.
With the new symbol open, Click File=> import. Select the skeleton from
the file you downloaded for this tutorial. This will import the gif to
your movie clip and separate the frames of the animation to keyframes.
 3.
We will be using our movie clip in front of the house so we need to clean up
the images and remove the background. In order to do this, we will trace
bitmap. Click on frame1 pof the skeleton movie clip. Click Modify=> Trace
Bitmap. Set the following: 3.
We will be using our movie clip in front of the house so we need to clean up
the images and remove the background. In order to do this, we will trace
bitmap. Click on frame1 pof the skeleton movie clip. Click Modify=> Trace
Bitmap. Set the following:
- Color Thresold = 80
- Minimum area = 3 pixels
- curve fit = tight
- Corner threshold = many corners
4. Click on frame 2 and trace bitmap with the same settings. Do the same
for all the bitmaps in each frame of this movie clip.
5. Click back on frame 1 of this movie clip. Use your arrow tool to
highlight just the black color. Do not worry about the patchy look of the
skeleton. He is dead already and we did not kill him:P When the black color
surrounding the skeleton is highlighted, indicated by the crosshatch over
the black, hit your delete key to remove it. Do this for each of the 15
frames. Click back to the main scene.
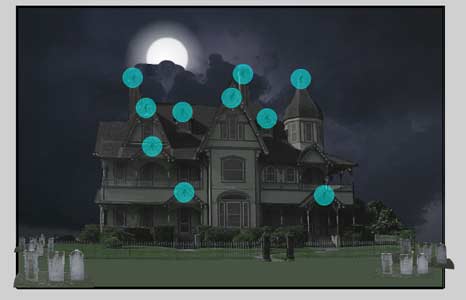
 6.
Add a layer called Skeleton on your main timeline. Drag a copy of the
skeleton onto the stage so the head is just below (infront of) the fence
and the skeleton is at the very right of the fence. Resize or scale him if you need to. With the skeleton
highlighted, click insert=> convert to symbol. Set the symbol name as
skeleton walk, and set the behavior as movie clip. 6.
Add a layer called Skeleton on your main timeline. Drag a copy of the
skeleton onto the stage so the head is just below (infront of) the fence
and the skeleton is at the very right of the fence. Resize or scale him if you need to. With the skeleton
highlighted, click insert=> convert to symbol. Set the symbol name as
skeleton walk, and set the behavior as movie clip.
 7.
Double click the skeletonwalk symbol. Click in frame 100 and hit F6 to
insert a duplicate keyframe. Move your skeleton to the left side of the
fence so that the top of the head is at the bottom of the fence. 7.
Double click the skeletonwalk symbol. Click in frame 100 and hit F6 to
insert a duplicate keyframe. Move your skeleton to the left side of the
fence so that the top of the head is at the bottom of the fence. 8. Click
back on frame 1 and set the properties inspector for that frame to tween =
motion. Click the button on the layers palette to add a motion guide. Draw a
semi circle using the pencil from the starting point of the skeleton to the
ending point..

9. Add a layer above guide. Call this layer actions. Click in frame 1. Open
your actions panel. Select actions=> movie control=> stop. 10.
Click back to scene 1 to view your main timeline. Highlight your skeleton on
the main timeline and open the properties inspector. Set the instance name
to bones and the color to alpha = 50%
 11.
Insert a layer above the the skeleton layer and call it skeleton mask. Draw
a rectangle from the bottom left corner of the fence to the bottom right
corner of the fence and up to the top of your stage on this layer. Right
click on the layer and select mask. 12. Click Insert=> New symbol. Call
the symbol Stone and set the properties as a Button. With this symbol open,
Click File=> import. Select the stones1.gif from the downloaded file. 13.
Click back to scene 1. highlight the top layer(now the mask) and insert a
layer. Name the layer stones. Drag several copies of the stones onto the
stage Transform them to scale and skew, and position them on either side of
the fenced in area. The furthest back stones should be smaller then the
foreground stones. Highlight the back stones and set the color on the
properties inspector to brightness -20. Stones in front of them should
be -10 in brightness. Foreground stones should be left as is.
 14.
With all your other layers locked except the stone layer, use the arrow tool
to select the top stones on the left. Open your action panel. Click
objects=> movie=> Movie Clip=> Methods=> Play. Click in the object box.
Click your target button 14.
With all your other layers locked except the stone layer, use the arrow tool
to select the top stones on the left. Open your action panel. Click
objects=> movie=> Movie Clip=> Methods=> Play. Click in the object box.
Click your target button
 and
select bones. and
select bones.
 Click
on the event handler, on(release) above. Check the rollover and rollout
also. Click
on the event handler, on(release) above. Check the rollover and rollout
also.
Repeat this for the other stones. Your skeletons are done. |


