Creating Twisted Star Shapes
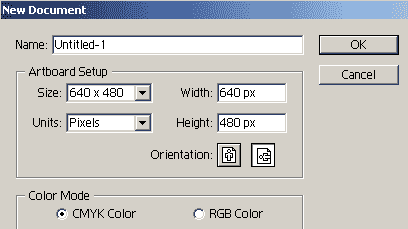
1. Open a new canvas. Set it to artboard 640 X 480, unites pixels. CMYK.

2. Select your shape tool and hold down on your tool box to reveal the
shape tools. Select the star tool.
 3.
Click in the middle of your artboard. The star options panel will open up
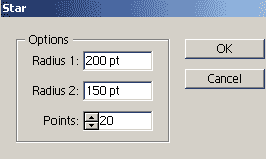
Set the following: 3.
Click in the middle of your artboard. The star options panel will open up
Set the following:
- Radius 1(outer points radius) = 200
- Radius 2 (inner points radius) = 150
- points = 20 (number of points in star)
4. After you click ok, you will have a star on your artboard. Since we
have not set stroke or color, it will default with your current settings. We
will change that now.
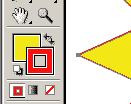 5.
Double Click on the fill color on your toolbox to bring up a color picker.
Select Yellow for fill color. Double click on the Stroke color on your
toolbox to bring up a color picker, select red. 5.
Double Click on the fill color on your toolbox to bring up a color picker.
Select Yellow for fill color. Double click on the Stroke color on your
toolbox to bring up a color picker, select red.
 6.
Open the stroke palette on the right, or click window=> stroke. If the
palette only shows a tab, click the double arrows on the tab to expand it.
Set the weight of the stroke to 8 pt. and hit enter. This will apply a wider
stoke to your star. 6.
Open the stroke palette on the right, or click window=> stroke. If the
palette only shows a tab, click the double arrows on the tab to expand it.
Set the weight of the stroke to 8 pt. and hit enter. This will apply a wider
stoke to your star.
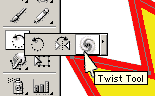 7.
The path is still selected as you have not deselected yet. Select and hold
down the rotate tool (R) from your toolbox. You will see a twist tool nested
with the rotate tool. Select Twist. 7.
The path is still selected as you have not deselected yet. Select and hold
down the rotate tool (R) from your toolbox. You will see a twist tool nested
with the rotate tool. Select Twist.
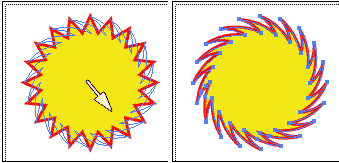
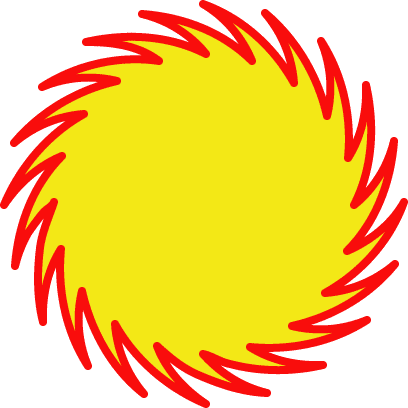
8. Click in the very center of the star and drag to the edge. Notice the
star twists. when you get a nice twist, release your mouse.
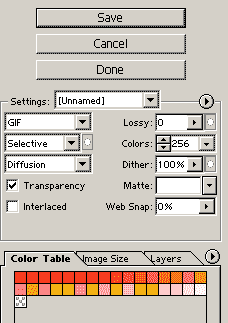
9. Click File=> save for the web. Set the following:
Click on the image size to resize your image. And click save. Set the
file name and your all set!
Move on saving in another lesson.
|


