 Compass: A Lesson in the Pen Tool Compass: A Lesson in the Pen Tool
You will need
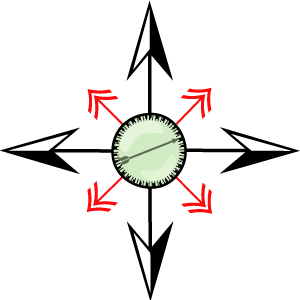
this image to complete this tutorial.
1. Open the compass.ai
Adobe Illustrator file from the zip file you downloaded. This is a template
we will use to make your compass shape. Open your layers palette and
highlight the arrows layer. Select your Pen Tool (P)

 2.
Click View=> Pointer. This should take you to the pointer template for
making the inside pointer in your compass. With your pen tool set to black
stroke, click on the point marked 8. click on the point marked 9. hold your
control key down and click elsewhere. Use your selection tool to select this
line segment. Set the Stroke on the stroke palette to a weight of 4 pt. Click filter=> stylize=> arrowheads. 2.
Click View=> Pointer. This should take you to the pointer template for
making the inside pointer in your compass. With your pen tool set to black
stroke, click on the point marked 8. click on the point marked 9. hold your
control key down and click elsewhere. Use your selection tool to select this
line segment. Set the Stroke on the stroke palette to a weight of 4 pt. Click filter=> stylize=> arrowheads.
 3.
Set the start box to arrowhead #3. Set the end box to arrowhead 17. Set the
scale to 50% and click ok. 3.
Set the start box to arrowhead #3. Set the end box to arrowhead 17. Set the
scale to 50% and click ok. Double click your magnifying glass tool to set the magnification of your artboard to 100%.
4. Set your default colors, and then set the fill color to no fill by
activating the fill palette on the tool box and clicking the no fill button
below. The stroke remains black. Select your pen tool again. Click the pen tool in the square marked
capitol A. This will set an anchor point for our starting shape at A.
5. Click in the square marked lower case a. A new anchor point is added
to the first anchor and a line segment occurs between the anchors. You will
see a highlight over your black segment.
 6. You can end the line segment by holding your control key and clicking
away from the anchor. Select the line with your selection tool and set the
weight of the stroke on the stroke palette to 7 6. You can end the line segment by holding your control key and clicking
away from the anchor. Select the line with your selection tool and set the
weight of the stroke on the stroke palette to 7
 7.
Select your scissors tool 7.
Select your scissors tool
 from the tool
box. The scissors will allow you to "cut" a line segment.. Move the scissors
over the middle of the line segment. Click on the middle of the segment.
Half of your segment will now be highlighted with a new ending anchor.
Switch to your direct select tool from the tool
box. The scissors will allow you to "cut" a line segment.. Move the scissors
over the middle of the line segment. Click on the middle of the segment.
Half of your segment will now be highlighted with a new ending anchor.
Switch to your direct select tool
 and
grab the new anchor and move it toward the edge of the circle on the
template to shorten the segment to go for outside to the circle. Click on
the other new anchor point on the other half segment and drag it to the
circle edge to make this segment shorter. Click select=> deselect. and
grab the new anchor and move it toward the edge of the circle on the
template to shorten the segment to go for outside to the circle. Click on
the other new anchor point on the other half segment and drag it to the
circle edge to make this segment shorter. Click select=> deselect.
 8.
Repeat steps 4-7 for a segment connecting Points B and b. 8.
Repeat steps 4-7 for a segment connecting Points B and b.
9. Repeat steps 4-7 for segments E-e and D-d but use a stroke weight of 4
pt.
10. Once you have all the line segments drawn and sized, it is time to add
arrowheads. arrowheads is a style that is built into illustrator. Remember
we started all our lines on the capitol letter points, A, B, D, E.

Select your selection tool.
 .Click
on the segment A1. Click Filter=> stylize=> Add Arrowheads. This will open
the arrowheads dialogue box. Select the arrowhead # 16 from the start(top)
box. Set the end box to non. Set the scale to 200 %. Click ok. .Click
on the segment A1. Click Filter=> stylize=> Add Arrowheads. This will open
the arrowheads dialogue box. Select the arrowhead # 16 from the start(top)
box. Set the end box to non. Set the scale to 200 %. Click ok.
 11.
Use the selection tool to select the 3-a line segment. Since a was the
ending point of our drawing, we will need to put our arrowhead on the
end when we stylize it. Click Filter=> Stylize Add Arrowheads. Set the start
to none. Set the end to arrowhead 15 and scale to 100%. 11.
Use the selection tool to select the 3-a line segment. Since a was the
ending point of our drawing, we will need to put our arrowhead on the
end when we stylize it. Click Filter=> Stylize Add Arrowheads. Set the start
to none. Set the end to arrowhead 15 and scale to 100%. 12. Repeat steps 8
- 9 for the B-2 and b-4.segments to add arrowheads. Be sure you add the
starting point to B-2 and the ending point to b-4.
 13.
Use the select tool to add arrowheads # 14 at 150% to the starting ends of E
and D (if you started your segment on E or D.). If you goof, just click
edit=> undo. Add arrowheads to e and d on the start end so the result
so far looks like on the right. 13.
Use the select tool to add arrowheads # 14 at 150% to the starting ends of E
and D (if you started your segment on E or D.). If you goof, just click
edit=> undo. Add arrowheads to e and d on the start end so the result
so far looks like on the right.
14. Open your layers palette and lock your arrows layer. Unlock your bubble layer and highlight it.
 15.
Select the pen tool set to black stroke. Click without releasing at point 1
to add an anchor there and drag to the right to the red handle dot. This
will bend the line some. CLick in point 2 and drag down to the red handle
dot. Click on point 3 and drag left to the red handle point. Click on point
3 and drag up to the red point. Mouse over point 1 until you see a o appear
next to your pen tool. The circle means that by clicking there you will
close the shape. Click to close the shape and drag to the right again to the
red dot. You should have a nice black outline circle now. Use your selection
tool to select it and change the stroke weight to 5 pt. 15.
Select the pen tool set to black stroke. Click without releasing at point 1
to add an anchor there and drag to the right to the red handle dot. This
will bend the line some. CLick in point 2 and drag down to the red handle
dot. Click on point 3 and drag left to the red handle point. Click on point
3 and drag up to the red point. Mouse over point 1 until you see a o appear
next to your pen tool. The circle means that by clicking there you will
close the shape. Click to close the shape and drag to the right again to the
red dot. You should have a nice black outline circle now. Use your selection
tool to select it and change the stroke weight to 5 pt.
 16.
While the bubble circle is still highlighted, click on the fill color swatch
on the tool box. Open your color palette and set the CMYK color of 40, 0,
50,0 so that a faint green fills your circle. Set the transparency to 45
percent. 16.
While the bubble circle is still highlighted, click on the fill color swatch
on the tool box. Open your color palette and set the CMYK color of 40, 0,
50,0 so that a faint green fills your circle. Set the transparency to 45
percent.
 17.
While your circle is still highlighted, double click the scale tool. Set the
scale to 100% and click COPY. On the new copy, set the fill to no fill and
the stroke to black, weight= 5. Set the transparency on the transparency panel back to 100%. 18. With the new circle still
highlighted, double click on the scale tool. Set the scale to 95% uniform
and click copy. Now set the weight to 10 point with dashed line, dash 4pt,
gap 10 point.


 19.
Now double click the scale tool again. Set the scale to 95% uniform and
click copy. Now set the weight to 10 point with dashed line, dash 1 pt, gap
5 point. 19.
Now double click the scale tool again. Set the scale to 95% uniform and
click copy. Now set the weight to 10 point with dashed line, dash 1 pt, gap
5 point. 20. Click directly on the green fill in the ring behind. Click
object=> arrange=> bring forward.
 21.
Click View=> bubble to display the template for making the bubble. Choose
the pen tool. Set your stroke to white and your fill to no fill for
now. Set the stroke weight to 1 on the stroke palette. The dotted lines of
the template represent where we want the resulting directional lines and
handles to go. Click on the number 5 point and drag up and to the right to
match the dotted line. Click on the number 6 point and drag down and to the
right so that the opposite handle and direction follows the dotted line
above point 6. Hold your alt key down and click directly on the anchor for
point 6and drag down again, but this time matching the handle below the #6. 21.
Click View=> bubble to display the template for making the bubble. Choose
the pen tool. Set your stroke to white and your fill to no fill for
now. Set the stroke weight to 1 on the stroke palette. The dotted lines of
the template represent where we want the resulting directional lines and
handles to go. Click on the number 5 point and drag up and to the right to
match the dotted line. Click on the number 6 point and drag down and to the
right so that the opposite handle and direction follows the dotted line
above point 6. Hold your alt key down and click directly on the anchor for
point 6and drag down again, but this time matching the handle below the #6.
 Click
on point 7 and drag to the left to match the handles. mouse over the end
point to see the o under the pen tool. hold your alt key down and click drag
up until the direction and handle below matches the bottom dotted line. Set
the transparency palette to softlight, 100%. You can rotate if need be. Click
on point 7 and drag to the left to match the handles. mouse over the end
point to see the o under the pen tool. hold your alt key down and click drag
up until the direction and handle below matches the bottom dotted line. Set
the transparency palette to softlight, 100%. You can rotate if need be.
22. Click inside your kidney shaped bubble and move over your green bubble
centered on 10 pm.. Set the fill to white, stroke to no stroke. While your
kidney shape is still highlighted, double click your scale tool. Set the
scale to NON-uniform at -80% scale height and width. Click Copy. Use your
selection tool to move the new kidney to center over 4pm on the compass. Set
the transparency on the transparency palette to 75% and softlight. 23.
move the first pointer you made over the compass and position it in the
circles. while it is highlighted, click Object=> arrange=> Send to back. |


