|
|
||||||||||||
|
|
|
||||||||||||

|

Editing Flash MX Movie PropertiesBy: CivicCX This tutorail will show you how to edit the basic properties of your existing or new Flash MX movie. - You can locate your properties of your movie by looking near the bottom of your page, and you will see a tab that should look like the one shown here. This toolbar is called "Properties", which is where you can edit information about your movie.
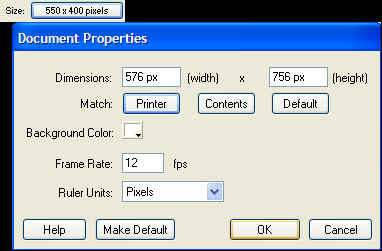
- To adjust the size of your workspace area select the button marked Size with a two numbers next to it. Click this button once. - A window will then open where you can adjust the size for your workspace area. Be sure to consider where the movie is going to be placed on your website when judging the size of the area.
- You can select how you want the work space are measured as well. For example... Inches, Pixels, Centimeters, Points, Millimeters, Ect. - You can select this option by choosing the button marked "Ruler Units" and choosing the unit you want form the drop down menu. - Okay, now you want to decide how you want to publish your movie (in which player) - Choose the option marked Publish on your properties toolbar.
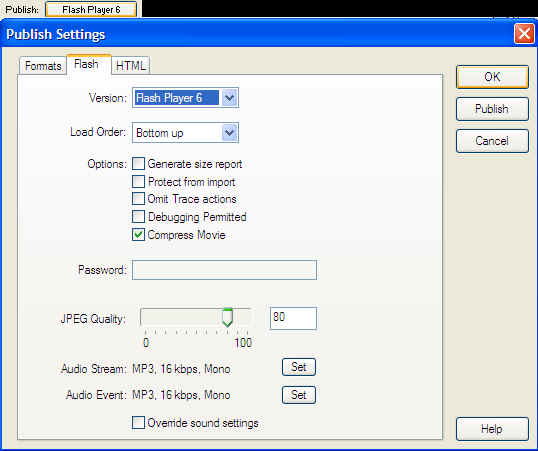
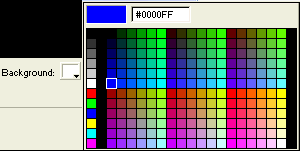
- Select what version you want to publish your movie in form the drop down menu in the dialog box which appears. - You can also set a password for viewing the properties of the movie and set the JPEG quality too. - Now that you have the size of your movie area and which player it is going to be published in, go back to the main Properties toolbar. - Choose the option that says Background and click the box to the right of it.
- A color picker will then be displayed, here you can choose which color the background of your movie will be. - Once you have chosen the color click outside the picker and it will apply it automatically.
"Building The Web Into a Nicer Place -- One Site At A Time"
|
|
|
||||||||||
| |
|||||||||||||

|
|
||||||||||||
|
|
|
||||||||||||