Dreamweaver Text Attributes
By: CivicCX
Click on the headers below to be taken directly to
the part in this tutorial to learn about the specific lesson.
Fonts
1) A font is a type of style for text. To
select a font or use a different font on your particular text open up
Dreamweaver.
2) Next type in something in the workspace area,
or select something you have already written.
 3) Once the text is selected go to
Text and down to Font.
3) Once the text is selected go to
Text and down to Font.
4) Another window will then pop up when selecting
font. Here it gives you the options of selecting a different kind of
font. Place your cursor over top of the font which you want to choose and click
once. This will then make the text you had selected into its new font.
Back To Top
Font
Size
 1) To edit the font size or to change the font size
once again go up to the top of your screen where it says text.
1) To edit the font size or to change the font size
once again go up to the top of your screen where it says text.
2) Click on text and
scroll down to Size or Size Change. Both of these will increase the size
of your font.
3) Choose which ever choice you prefer to change
the size of your selected text. Once clicking on a selection you will be atomically
taken back to the workspace are, but your font size will now be different.
Back To Top
Font
Styles
A font style is what the font is going to look
like. It is similar to a regular font but basically lets you edit the font
that is already there. Examples of font styles are Bold, Italic,
Underline, Strikethrough, Teletype, Emphasis, Strong, ect.
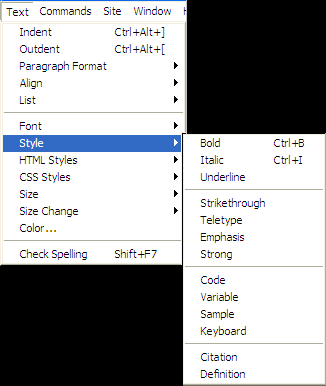 1) To access these options go to the menu on the
top of your screen where it says text.
1) To access these options go to the menu on the
top of your screen where it says text.
2) Click once on Text and scroll down to what
says Styles.
3) Another menu will appear to the side of
Styles, here you can choose any of the options on the list. Some examples
of styles which you can select are shown below.
Back To Top
HTML
Styles
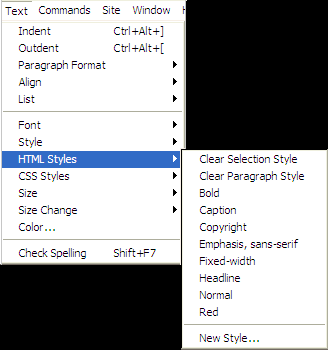 A html style are shortcuts which automatically format
certain text areas such as Caption, Copyrights, Headlines, Fixed Widths, ect.
A html style are shortcuts which automatically format
certain text areas such as Caption, Copyrights, Headlines, Fixed Widths, ect.
1) To automatically get these formats select text
on the top of the main toolbar.
2) Scroll down to HTML Styles.
3) Another menu will appear, here you can choose
any of these fixed heading.
4) This can save you time, by using these formats
which are automatically built in to Dreamweaver.
Back To Top
Font
Color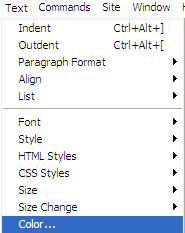
1) To adjust the font color
view the text toolbar.
2) Scroll down to
Color, and click once.
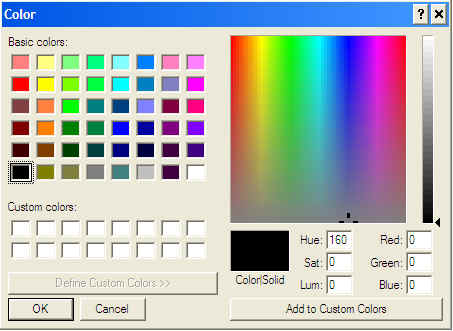
3) A panel or window
will show up will many different colors.
4) With your text still
selected click on the color of your choosing and click okay/select.
Back To Top
Paragraph
Alignment
1) To make the paragraph align either left,
right, or center view your text toolbar.
2) Scroll down to Align, and hover your mouse
over it.
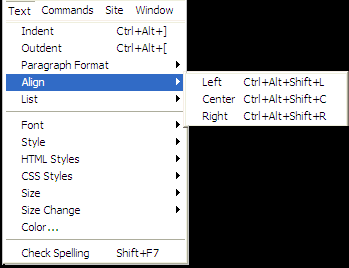 3) Another window will pop up to the right side
of it, with three options. Left, Center, Right.
3) Another window will pop up to the right side
of it, with three options. Left, Center, Right.
4) Click on the option you prefer. Once you
have clicked on your option it will be shown in the workspace in Dreamweaver.
Back To Top
Indent
& Outdent
Indent- To space a paragraph and or sentence
about five spaces ahead of the rest of the paragraph and or sentence.
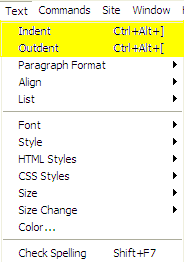 Outdent- To un-space a paragraph and or sentence
about five spaces back to align them evenly.
Outdent- To un-space a paragraph and or sentence
about five spaces back to align them evenly.
1) To complete either of these tasks select Text
on the top of Dreamweaver program.
2) Scroll down to either indent or outdent,
click once.
3) In the workspace below it will show the
outdent, or indent.
Back To Top
Spell
Checking
If you have typed an entire document and you would like
to make sure you have spelled everything correctly follow these simple steps.
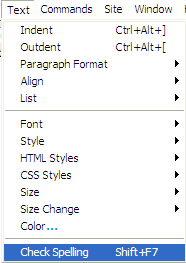 1) Select the Text toolbar.
2) Scroll all the way down to the bottom to the
last option, which displays Spell Checking.
3) Click on this, it will the run you through the
process of checking all of your words to make sure everything is spelled
correctly.
Back To Top


